
How To Care For Your New Air Plant
Woop woop, they have arrived!

First of all take time to admire and fall in love with these magical creatures after all no soil, no proper roots yet beautifully living of water, air and love.

Best thing to do to welcome them home is to give them a good soak in a water bath. Submerge them completely in water for about 20 minutes but don't worry if you have them bathing a little longer.
Gently take them out, best hold them upside down and shake off / remove any excess water. If you think the plant feels still a little wet and you want to be on the save side just have it rest for a little while upside down.
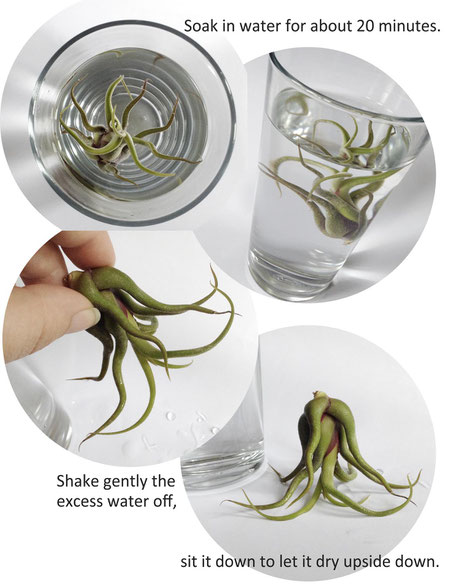
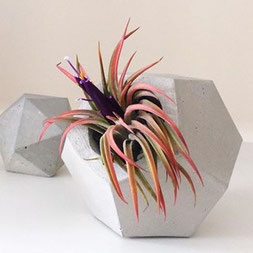
Looking Good! Take your happy Air Plant and set it on/in your concrete vessel. The recess should provide enough air circulation and when you place it now in a bright light spot a lifelong bond could just have begun.
Congratulations and don't be shy to share, ask or comment and feel invited to show your success I sure love to see it!
Antje
How To - Caring For Your Air Plant
As you may know there is a great variety of Air Plants available yet I have chosen just a few. Why?
Not just the size or sturdiness are points to consider but also the question of which light is preferred as the worry of displaying them together should not arise.
The Light
So here it comes, don't worry you will find a spot, as they are happiest when they are kept where they will receive bright, indirect sunlight or under fluorescent home or office lighting.
Yes! That's why they are happy on your desk and looking good and trendy in their concrete vessel.

What else? - of course if you love them you water them!
The Water
Well, there are many methods out there from letting them soak under rinsing water to spray regularly.
To me the rinsing water method is out of the question - water should never be wasted!
Water spraying them is, as I find, too messy for desk or sideboard displays. Well of course this is up to you but best results, and you know I shout out loud when I managed to get them flowing
bright, is the soaking method. It's nice and easy.
Once or twice a month I give them a good bath and we all are happy. I do it more often if the air is really dry but you will soon see when the leaves are not so strong anymore and it requires
more water.
Maybe one last tip [as written on the small info card delivered with your plant] use filtered water or rain water as sometimes tab water contains to much lime.
Happy growing,
Antje
Doping For Your Air Plants
Do you like a hot wonderful bubble bath? - guess what, your Air Plant does too!
Unbelievable right?! - but if you really want / need to do something really nice for your Air Plant prepare a lukewarm bath from -just- filtered water for it. Use the soaking method and you will literally see you Air Plant grow stronger right there.
Take your plant out once the leaves are strong and fully soaked up, anything from 20 to 50 minutes. Don't forget to let it dry fully before nesting it back.
There, that's it, another low cost Air Plant caring secret shared.
Happy Air Plant doping,
xx

The Air Plant Life Cycle
Blooming
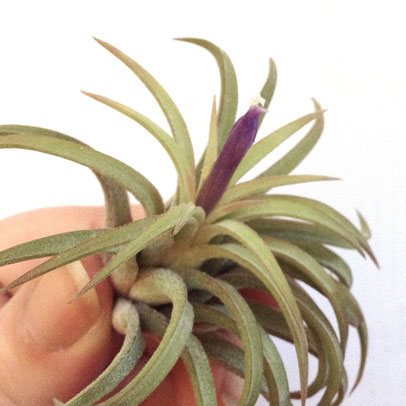
Tillandsias or Air Plants are tropical plants that usually live for several years however will bloom and produce flowers only one time during their lifetime.
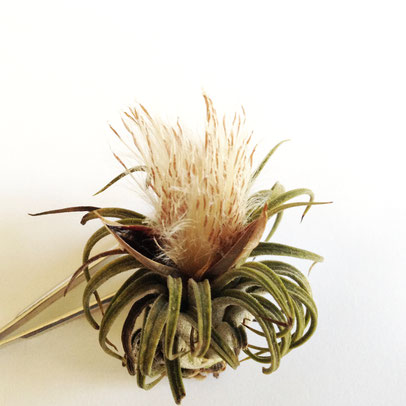
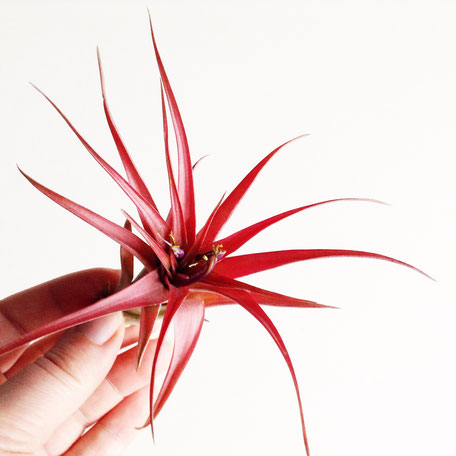
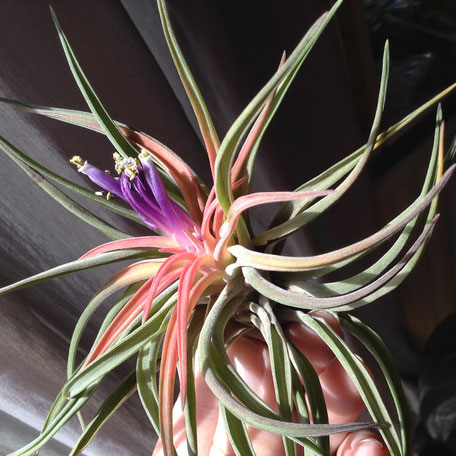
The flowers are striking and brilliantly colored, and the bloom period will last from several days to many months, depending on the species. Take the Rubra on the left for example, we are about 2 months in and the blue flower is not fully grown yet. Have a look below and find it a bit further along. The C. Medusae, 2nd picture below, is about 4 months into the process and the dark blue to purple flowers have yet to grow out of the pink capsules. Different species bloom at different times, also depending on their care and environment. Although I have seen it happening all year around it is said that a plant will most likely go into bloom sometime between mid-winter and mid-summer.


Each pup will follow the lifecycle by growing into a parent plant, blooming and producing pups of it's own.
If you require pups for your project please feel invited to get in touch as I will often be able to help.
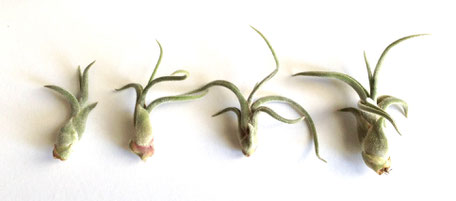
Pups
Air Plants will produce offshoots, or "pups." You'll notice the pups have a separate and distinct center of their own, distinguishing them from the other leaves. Once the pup reaches at least one-third of the size of their parent plant, the pup can be removed by gently pulling it apart from the parent. Some recommend to use knifes, however I found the pulling apart after the plant has been watered was the kindest method for the parent and pup plant to be separated. Hold both the parent and the pup at their bases and gently twist in a downward motion.
Clumping
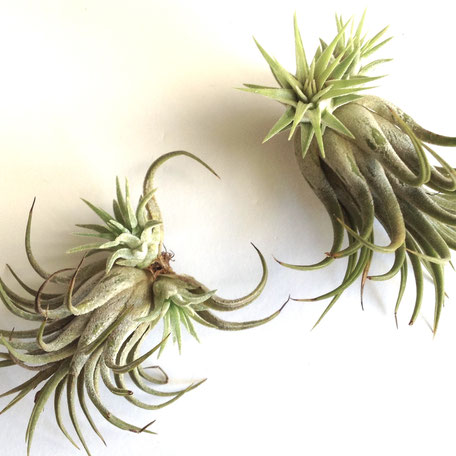
Well, if you leave the pups to grow on the parent plant the Air Plant will create a clump. The alternative and often faster way to create a clump is by wiring multiple plants together. They will begin to grow into and around each other.
Often clumping is also found on permanently mounted Air Plants. You can mount Air Plants to almost any surface for display as they do not require soil to grow and thrive.
Growing Air Plants From Seeds
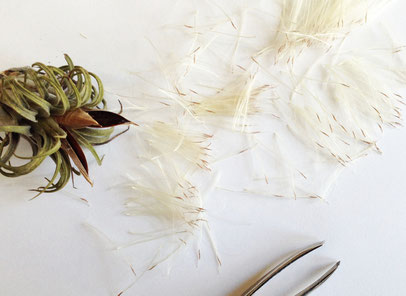
I feel so lucky that this wonderful Rubra Air Plant surprised me this Easter with an amazing explosion of its seed bomb!
So now what to do with it?!
First of all it took almost a year to get here. The Rubra bloomed for a couple of months first [image on the right], changed her leave colour from this lovely pink back to green and a dark brown hard 'cone', the seed pod, formed in the centre.
Step 1:
I got a sheet of clean paper and used tweezers to empty the seed pod. I tried to gather as many seeds as I could.
I put the plant aside and got my container which is lined with soft tissue paper.
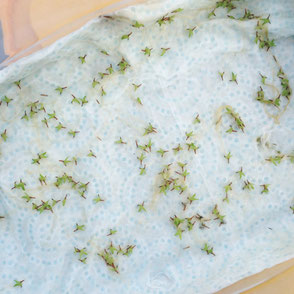
Step 2:
The seeds are usually carried by the wind and have this white silky soft fluff around them. I used it to pull them gently apart from each other to place them on a sheet of soft tissue.
Step 3:
My seed covered soft tissue sheet is in a dairy container. I read that others used cotton for the first watering as well as experimenting with a straight away planting into moss. I think the latter will work fine in green houses but sadly I don't have one - well not yet anyway!
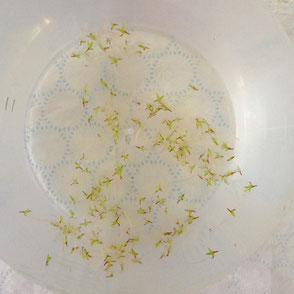
Step 4 [below]:
Soaking the seeds in filtered water. [My paper is proper wet, some seeds even float in the water, so I would say the water level in the container is at about 2cm.] From here I am moving on to step 5 ...
Step 5 [right]:
Covering my dairy container to simulate the green house conditions. I know it's not ideal but it was the only container on hand and it is only for the first month. After that I will have a clear container and move them onto a moss bark base. For their first year of growth in a warm light filled spot on my window sill.
In regards to the 'mother' plant I am not sure what will happen with her. I read that it will die but I am not sure about that yet. Even though it looked very stressed after that stunning seed explosion it took on water and is still going strong.

Well altogether - they are called Air Plants as they get their nutrients from water and the air and as you can see you can propagate tillandsia from seeds, but it takes two to four years to grow the plant to a suitable size for enjoyment. The best way and the way I am used to is to propagate Tillandsia through the division of the offsets, or pups.
Want to learn more about pups check out my blog post about the Air Plant Life Cycle!
Let's just see how things go, it's my first time to do this as well so wish me luck!
Antje
Growing Air Plants From Seeds - The Germination Process
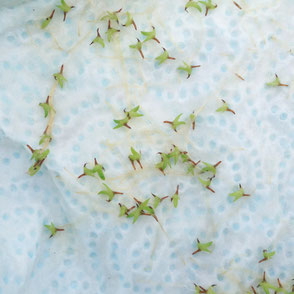
Here we go - I think we are about two months in and I am happy to report things are slow but successful so far.
It looks like that the decision to have the seeds sit, well almost swim, in a proper wet environment was a good one as it has triggered the seeds to grow. As for the temperature, I have to admit that I did not make a fuss about that and decided, since I can't offer a greenhouse, the windowsill at room temperature must do. But, I have to admit, I talk to my plants quite a bit, so maybe that helped ;)
The first look inside the container after the lid came off - yippee the germination process is in full swing!
Since I found also some rotting seeds I decided to give them a good bath in filtered lukewarm water. Clean, already of a strong green colour and just about 4mm big.
I put them back in the cleaned container. This time the sheet is just damp, not proper wet like last time, I closed the container again and put it back into a light filled but not hot spot.
Meanwhile more Tillandsias started to surprise with delightful bright colours ...
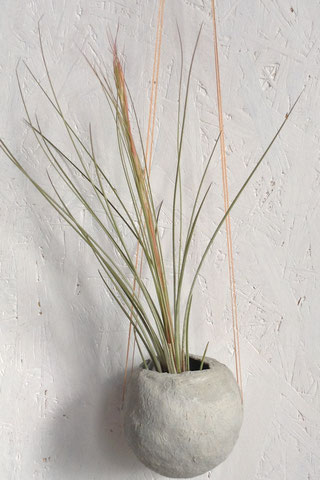
Above are the B. Multiflora to the left and the softer Abdita Tillandsia to the right. On the left is the Juncea grass in its early stages of blooming. The grass like leaves have already started to change colour to a more orange / red shade. I am just in awe that every time I go and get one for you to wrap or to care for them they hold a surprise like this for us.
Green thumps up and cheers to happy simple gardening,
Antje
Psst...
How the seed growing begun can you find in this post - 'Growing Air Plants from Seeds'! And should your plant been grown up or should you have some Air Plant pups already the Air Plant Life Cycle may be of interest to you.
How To Revive Your Air Plant After The Summer Holidays
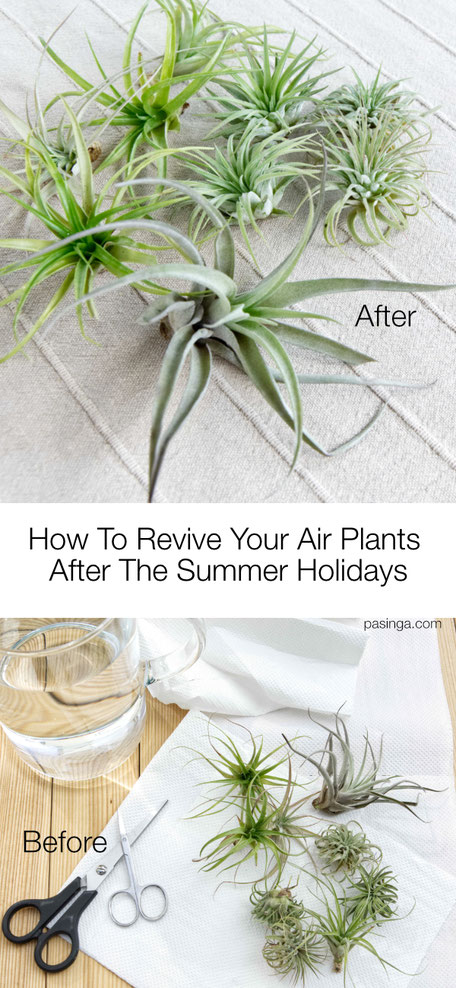
The Summer holidays have been amazing, right?! In London the sun was bright and hot, inviting to relax in long summer evenings. Point being, I did not water my Air Plants regularly and they are showing it - so how to revive them?!
First things first, it is usually a winter sickness but just in case - it is likely that an Air Plant has rot if your plant shows brown leaves or has leaves falling out from the centre. This happens if it is over-watered, sometimes when you spray your Air Plants but the ventilation afterwards isn't good enough or they could not fully dry in the base area of the plant after dunking it in water [recommended method]. Unfortunately, not much can be done here. Don't be sad, these things happen and it just means you cared too much.
However, should you find the base in the early stages of turning brown, developing rot or just part of it has a brown 'wet' feeling spot to it, not all hope is lost. And you can proceed in the same manner as with the summer sickness.
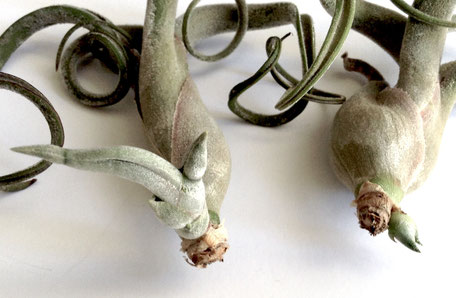
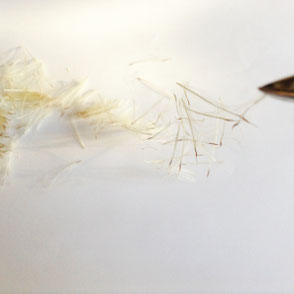
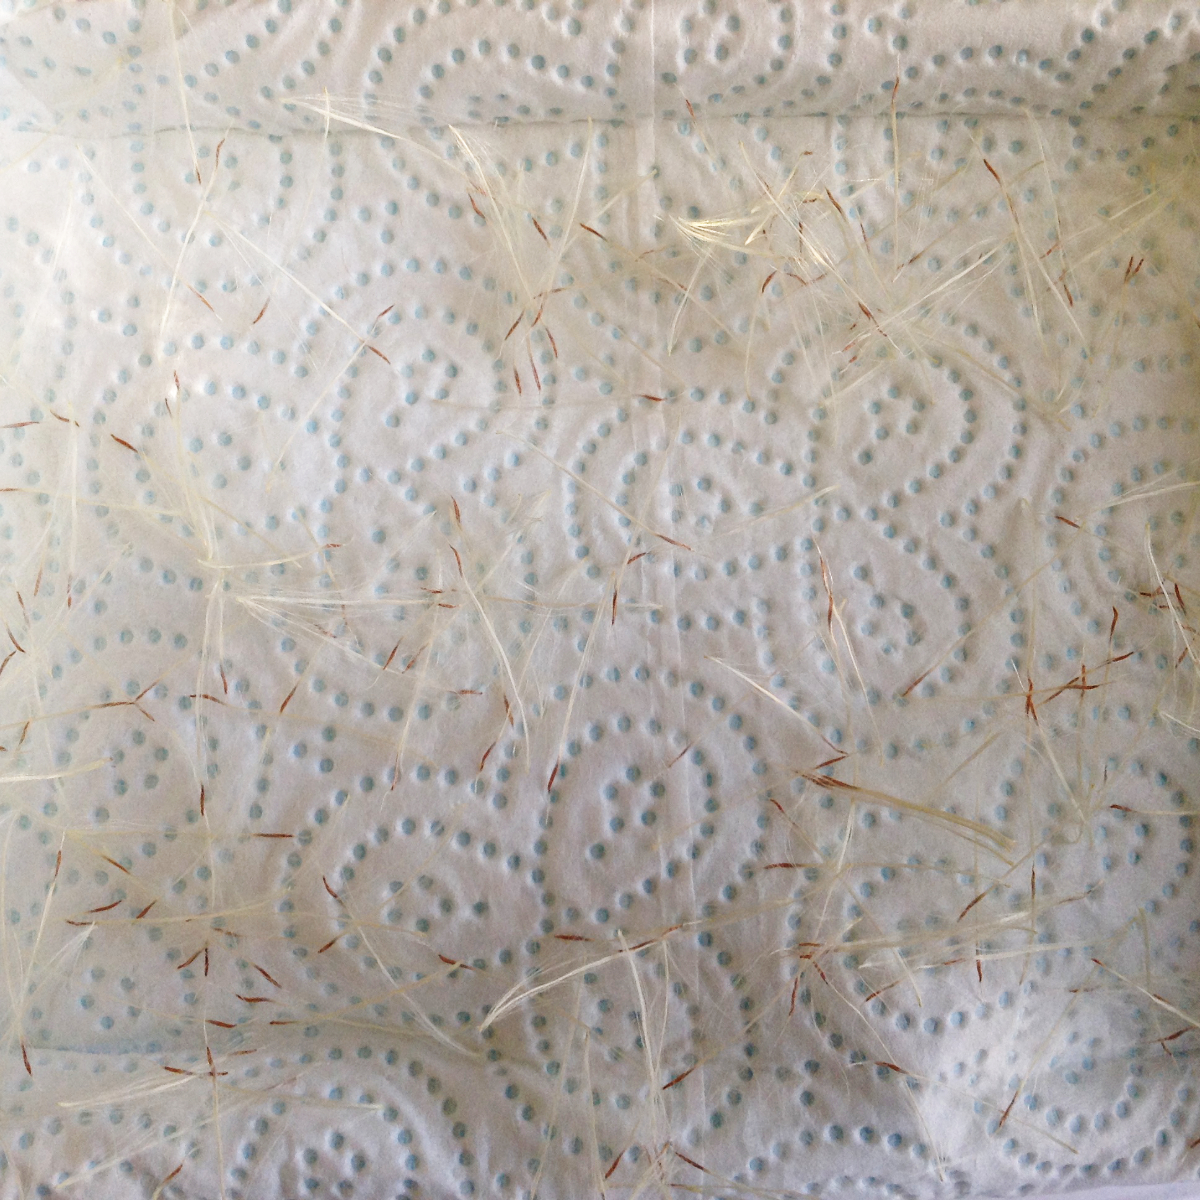
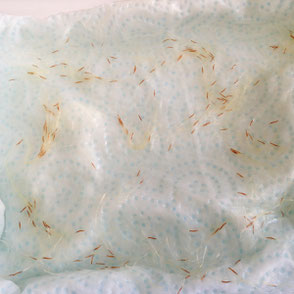
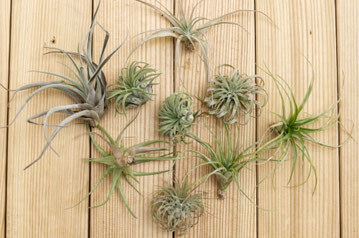
Summer sick Air Plants are plants who show signs of dry leaf tips or even whole dry leaves, the leaves are often too curly or too pale and not stiff. The Air Plant itself looks small and 'weak'. I captured a few of those signs in the picture row below to help illustrate the signs.
Your Air Plant just had enough and will appreciate the following.
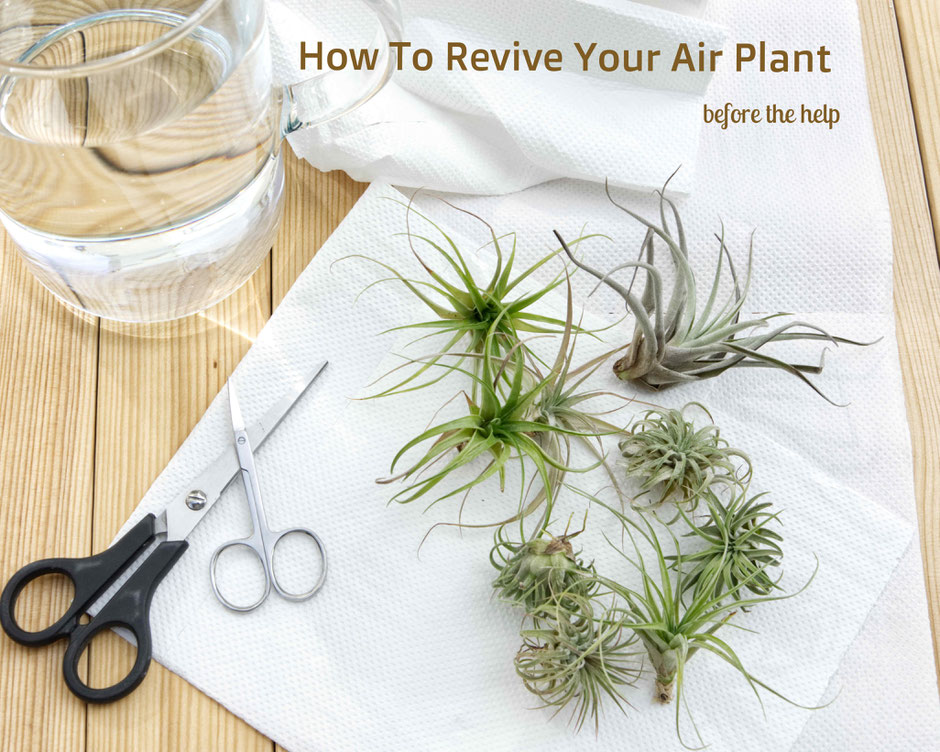
Prep a first aid 'doping' Air Plant bath for them with filtered lukewarm water and let them soak for a couple of hours.
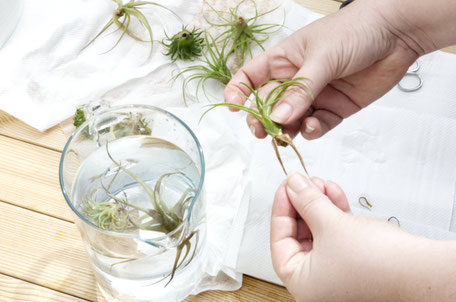
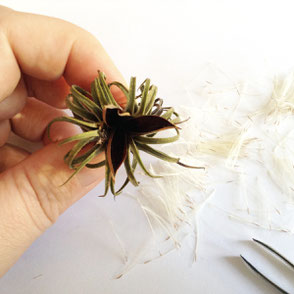
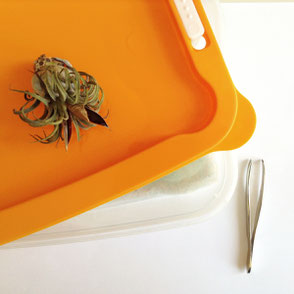
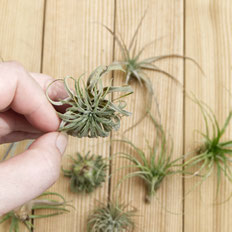
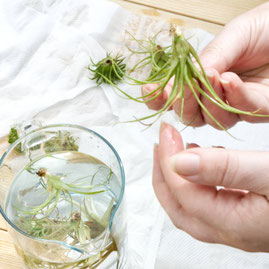
After a while [1 to 3 hours] you should be able to notice that the leaves uncurl and stiffen. Often the whole plant looks and feels bigger. At that stage I take the plant out of the water and use the strengthened yet wet state to take off all proper dry, brown leaves. They are now easy to spot as they are not revived and often on the outside / base area of the plant. Your plant does not need to carry that burden any longer and you should take those outside leaves off one by one in a downward move [picture left]. Take it slow and make sure there is not much of a resistance. If there is - stop for now and put it back into the water.
Well, I think it's time for a cuppa or something else you enjoy doing. Let your plant/s sit in the water for at least another hour or so. Once you decide it's time and it looks all strong, even though not totally good, get your work station prepped. You will need a towel to have it dry on and some fine clean scissors.
If you trim [prune] the brown tips will be up to you and your preferences. Brown tips are not harmful to your Air Plant and often rarely visible, especially with all the silver greyish plants [for example the Oaxacana or C. Medusae].
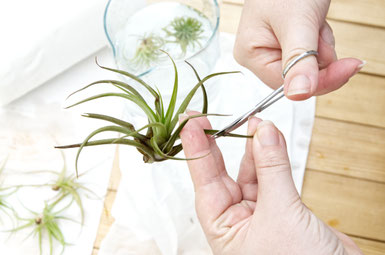
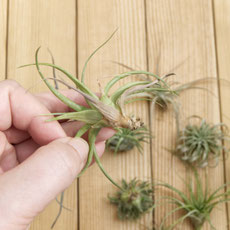
But should you decide that your plant could benefit from this and if you have a rather green plant like a B. Multiflora it is most likely that it will, go for an angled cut [image above]. This way the cut will create an illusion of a leave tip rather than a shout of 'Hey, I got cut'. Done and done, put your plant upside down on the towel and let it dry for several hours before putting it back upright in your himmeli, wallhanging or into the concrete vessel.