
I feel so lucky that this wonderful Rubra Air Plant surprised me this Easter with an amazing explosion of its seed bomb!
So now what to do with it?!
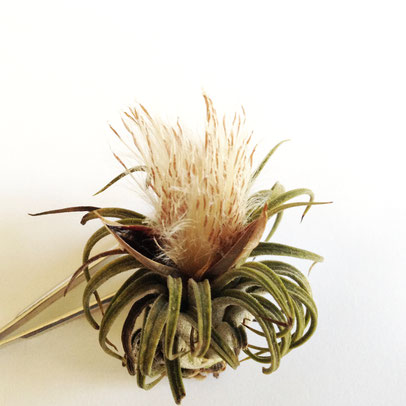
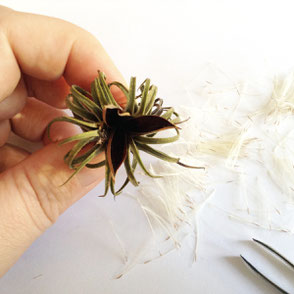
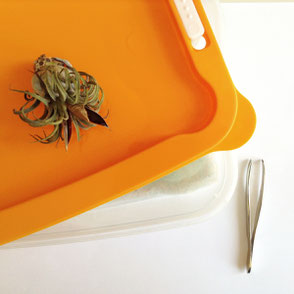
First of all it took almost a year to get here. The Rubra bloomed for a couple of months first [image on the right], changed her leave colour from this lovely pink back to green and a dark brown hard 'cone', the seed pod, formed in the centre.
Step 1:
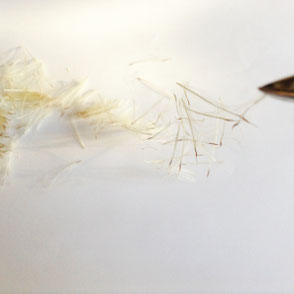
I got a sheet of clean paper and used tweezers to empty the seed pod. I tried to gather as many seeds as I could.
I put the plant aside and got my container which is lined with soft tissue paper.
Step 2:
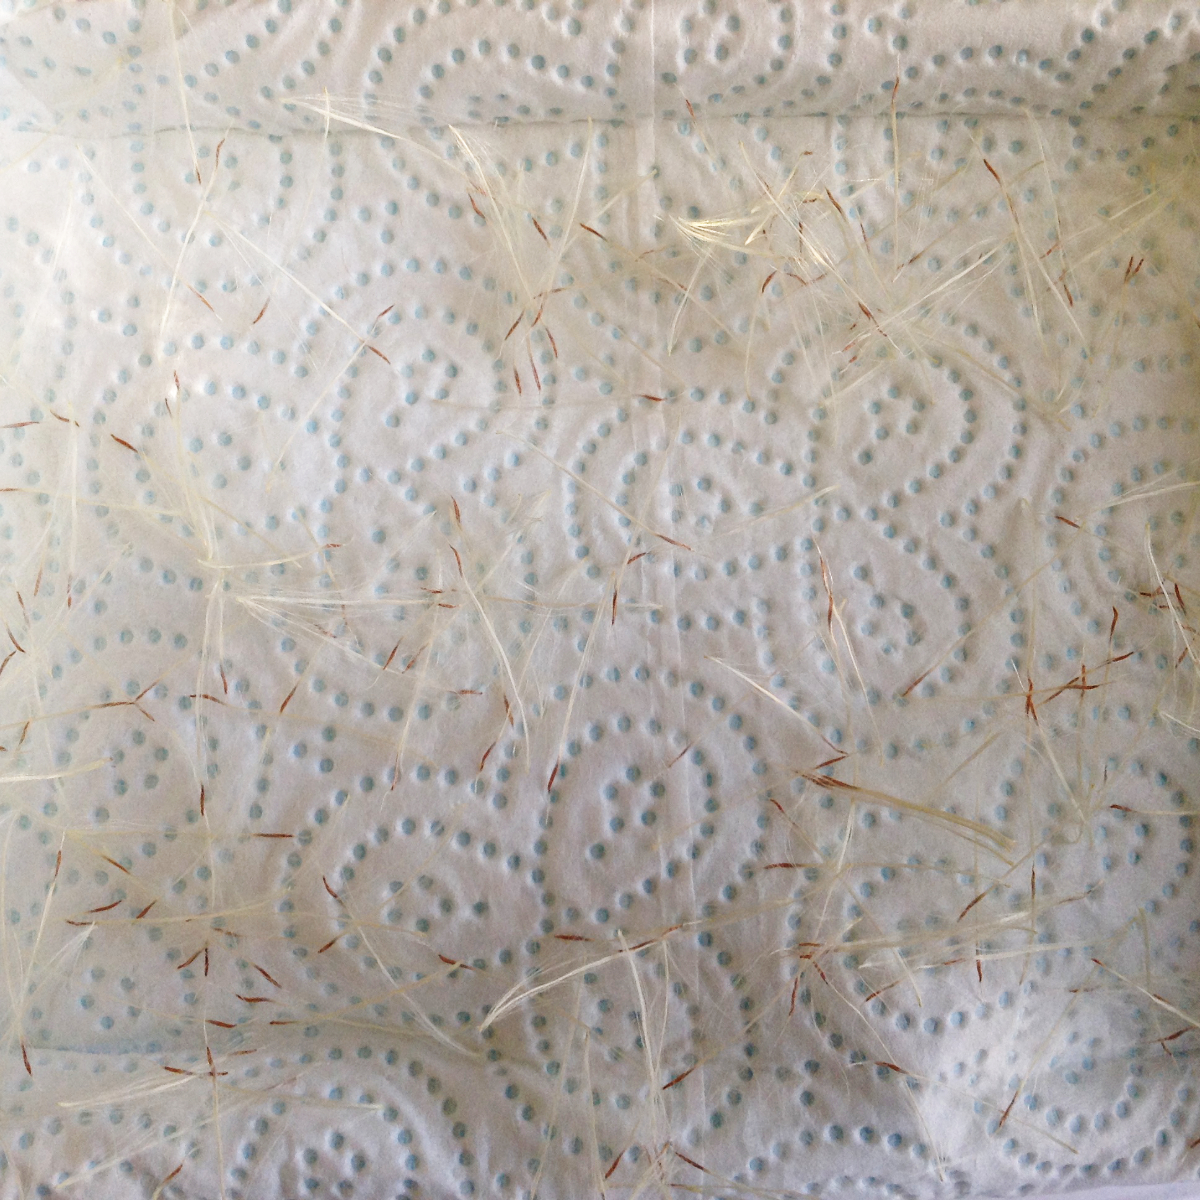
The seeds are usually carried by the wind and have this white silky soft fluff around them. I used it to pull them gently apart from each other to place them on a sheet of soft tissue.
Step 3:
My seed covered soft tissue sheet is in a dairy container. I read that others used cotton for the first watering as well as experimenting with a straight away planting into moss. I think the latter will work fine in green houses but sadly I don't have one - well not yet anyway!
Step 4 [below]:
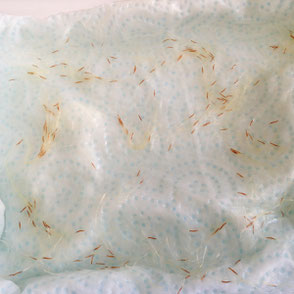
Soaking the seeds in filtered water. [My paper is proper wet, some seeds even float in the water, so I would say the water level in the container is at about 2cm.] From here I am moving on to step 5 ...
Step 5 [right]:
Covering my dairy container to simulate the green house conditions. I know it's not ideal but it was the only container on hand and it is only for the first month. After that I will have a clear container and move them onto a moss bark base. For their first year of growth in a warm light filled spot on my window sill.
In regards to the 'mother' plant I am not sure what will happen with her. I read that it will die but I am not sure about that yet. Even though it looked very stressed after that stunning seed explosion it took on water and is still going strong.

Well altogether - they are called Air Plants as they get their nutrients from water and the air and as you can see you can propagate tillandsia from seeds, but it takes two to four years to grow the plant to a suitable size for enjoyment. The best way and the way I am used to is to propagate Tillandsia through the division of the offsets, or pups.
Want to learn more about pups check out my blog post about the Air Plant Life Cycle!
Let's just see how things go, it's my first time to do this as well so wish me luck!
Antje
Write a comment
The Furnshop (Thursday, 21 June 2018 13:13)
Wow... this is really nice. I liked these air plants. Thanks for sharing this post.
https://www.thefurnshop.co.uk/
Steve (Monday, 10 September 2018 09:05)
How are your seeds doing? I've got an airplant with seed pods which I'm looking to plant up soon
Antje PASiNGA (Monday, 10 September 2018 10:30)
Hi Steve, they are growing nicely - have a look at the post I did about it a couple of months after those steps described here - https://www.pasinga.com/2018/07/18/growing-air-plants-from-seeds-the-germination-process/
Good luck and happy growing!
James Patrick (Thursday, 13 September 2018 00:29)
In step 4, it says soaking of seed. How much water? How long before you cover the container?
Antje PASiNGA (Thursday, 13 September 2018 09:23)
Hello James,
I covered it all with filtered water. I made sure that the paper was proper wet and some seeds have been floating in the water. I could not find a difference between the seeds floating in water or being on top of the wet paper almost all of the seeds started to grow. I covered the container straight away. I have added some notes above as well.
Happy growing!
James Patrick (Sunday, 16 September 2018 08:36)
Thanks for your reply and it really made the guide more easier and practical to understand. Just another point of clarification, I would assume that in the growth process the water level inside the container will reduce in due course. Is that correct? Thank you.
Antje PASiNGA (Sunday, 16 September 2018 14:36)
Pleasure James!
Yes, however if your container is covered it should not completely dry out. Anyway, I cleaned the container after about 6 to 8 weeks. I could see that there was growth and I wanted to make sure that they have all they need, you can read all about it in my follow up post. Altogether, I would say they are very grateful plants - as so far only light, water and time was needed.
James Patrick (Thursday, 27 September 2018 13:21)
Just another point for clarification, how about sunlight exposure? Thanks again. Cheers.
Antje PASiNGA (Wednesday, 03 October 2018 11:22)
Hi James, well I kept and keep them in the daily container. No direct sunlight just filtered light.
I keep my Air Plants mostly away from sunlight as I think they are happiest in the shade or with filtered light. Some of them grow beautifully in artificial light.
Jordi (Wednesday, 26 June 2019 20:21)
Hi Antje!
How are your tiny tillandsias doing? I have got myself some seeds from our Schiedeana and after two weeks they are starting to show their green micro leaves, amazing! I used a bed of wet sphagnum inside a small tupper and spread the seeds over it. I open the tupper every day to let the air circulate inside the container, and I spray it with water to keep the humidity high. And now I let the tupper under filtered sunlight, let's see if these tiny tillandsias want to grow up!
Thanks a lot for your posts, very interesting and encouraging ideas!
Regards,
Jordi
Antje PASiNGA (Thursday, 27 June 2019 13:16)
Hello Jordi,
That sounds wonderful! You have done so much already. I have to admit, my care program is far less advanced, thanks for the insides. Well, as soon as they looked like little plants with 3 or 4 tiny leaves I stopped closing the lit fully but stilled covered the box. From there they just started to grow just like all my other Air Plants. I do the dunking once or twice a month and they are just on my 'baby' shelf now. Since I am selling them I try to keep them as clean as possible so I did not attach them to wood or rocks.
I am sure your Air Plants will do wonderful, so much love! Happy growing!
Best wishes, Antje
Jordi (Thursday, 27 June 2019 16:06)
Thanks a lot for your answer!! Nice to know that your tillis are on their way! Please, if you have free time, post a new entry with more photos, would be great to follow the whole project till they are grown up.
Best wishes,
Jordi
Nicona (Saturday, 21 March 2020 23:53)
Hi I ordered so seeds online but they are just a little black seed... would I use the same technique?
Antje PASiNGA (Wednesday, 25 March 2020 10:24)
I would think so Nicona, however I only know Air Plant seeds with the fuzzy fluff. Where did you get it from, maybe they have more instructions or give the advise to use a moss sheet instead for more grip and so on ... Not sure but best of luck and happy growing!
Cw (Friday, 20 November 2020 01:29)
My airplane flowered and now a pup is growing at the side. I would like to know how do I get the mother plant to produce seeds?
Antje PASiNGA (Friday, 29 January 2021 08:04)
Hello Cw - well if the blooming process is completed you can only wait and see try not get the part of where the colourful flowers have been wet as this where the capsules or seed pockets would form. Give it a couple of months and good luck !