I think, I've got the most fun DIY concrete tutorial for you yet!! What could be more Winter than a bit of snow, candle light evenings and pine cones around the house - nothing right?! Not to mention the Scandinavian decor trends which all feature prominently pine cones in all sorts and sizes and why not, it's a natural beauty.
My take is to display them floating which makes a perfect eye-catcher on a sideboard, window sill or adds an extra dimension to a table scape or buffet display. But enough with my decor phantasies let's get right to it and make these floating pine cone concrete stands first!
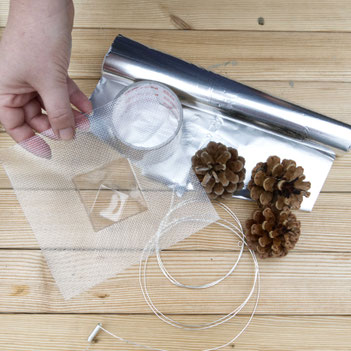
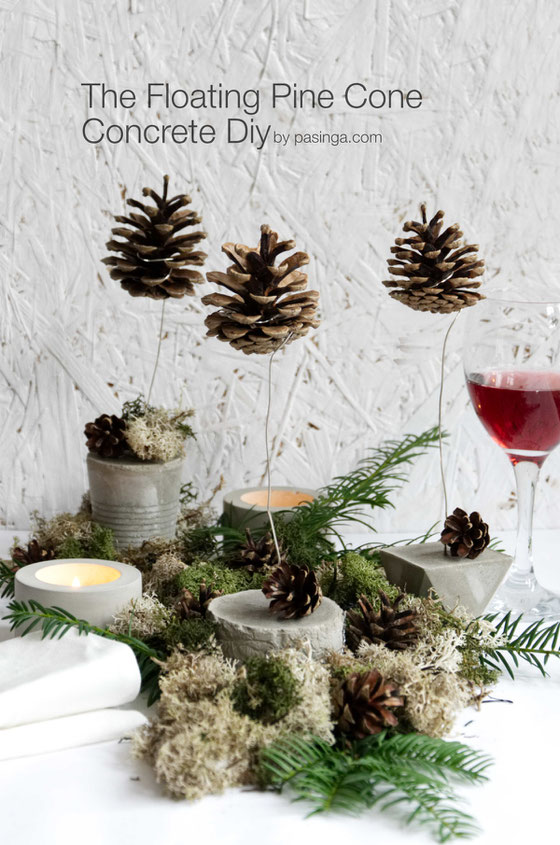
Materials:
As many recycled mould or plastic moulds as you want to craft,
wire in your desired finish, Aluminium kitchen foil, large pine cones, concrete mix, mixing tools and maybe sanding paper,
and for your safety - glasses, a mask and gloves
Workstation & Time:
It is best that things remain where they are poured for at least 2 to 3 hours for most fast setting mixes or 24hours for a standard mix; it helps if the surface is flat and fairly straight; Minimum Time required is 3 hours but you will have 2 hours free time in-between
First things first - preparing the moulds ....
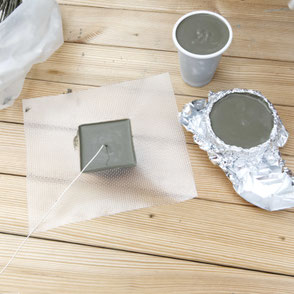
My go to choice for a recycled mould is my cardboard tape roll but a small Kraft or card box could work as well.
An alternative mould here is my geometric circus plastic mould but any plastic cup works too, just make sure it is fairly clean.
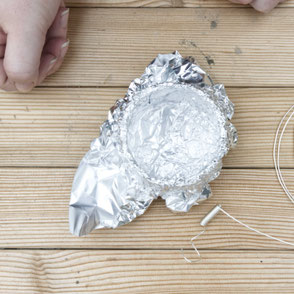
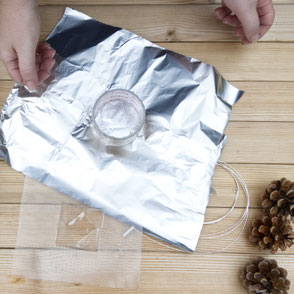
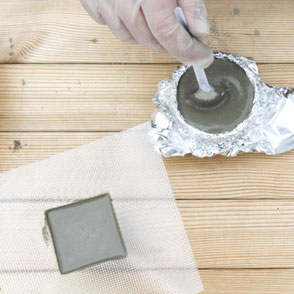
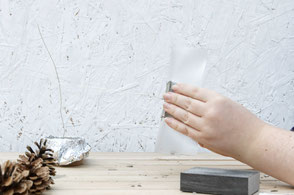
Take a large sheet of aluminium kitchen foil and cover the inner of your mould. It is best to start from the centre of the mould and work your way to the edges.
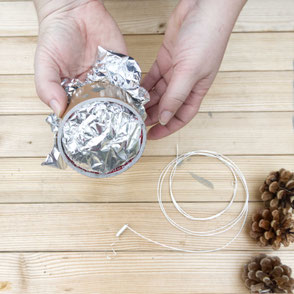
Try to go all the way down to keep the shape of your mould while adding texture with the aluminium foil.
Tip > the tighter you wrap the aluminium foil inside the finer the texture will be and it will be easy to take the foil off. However, I left some bigger gaps for the concrete to form around and to have hopefully some foil parts stick permanently to the concrete. We will see how that is going to work out later!
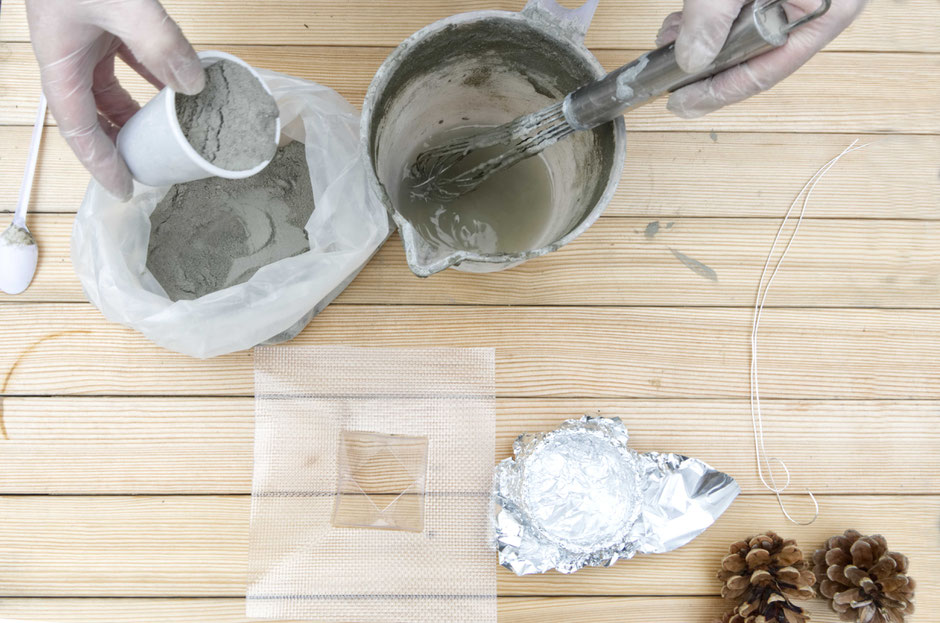
The Workstation - get your mixing tools, gear up with mask, glasses and gloves. Once done it is time for some water and your concrete and aggregate or a quick mix. I recommend a quick mix as it will only need some water and keeps the project time down. You can choose any mix available at your home or builders market as long as your solid is not much larger as 10x10cm. More on this can also be found in my previous DIYs.
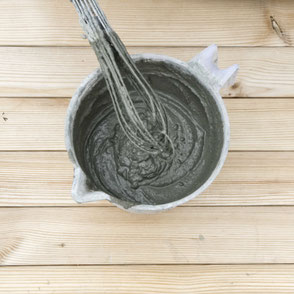
Mix your concrete! Here I used a 1:3 ratio, so one plastic cup water and 3 cups concrete mix. But as I said the mix will depend on the brand you are using. The ratio should be on your concrete mix as well and it is always good to check those instructions too.
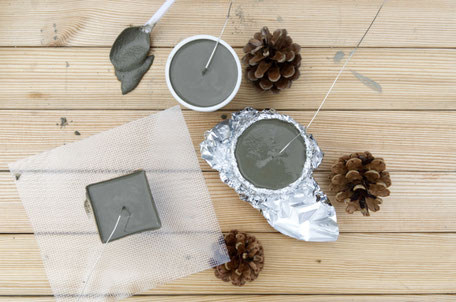
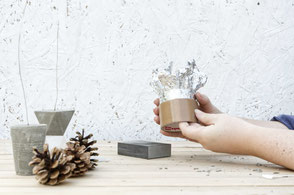
So once the mix feels ready you can take a spoon and fill your moulds. You don't have to fill them all the way but mine are fairly small and I want a proper base to decorate and make a statement. However, it should be at least 2 to 3 cm in height since the wire will need to be inserted as well.
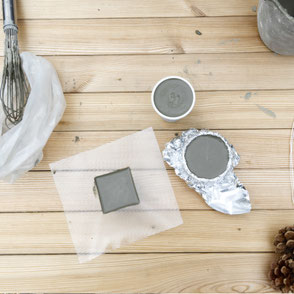
I like a flat top surface so I tapped the sides of the mould and reeled some air bubbles this way and evened the surface. From now on, I have them standing in the same spot where I am going to insert the wire in a sec as well as where they are going to cure.
Rule of thumb > your mix should be keeping the shape as indicated above and when you shape the whole mixture it will even out but only then. Even more details are here too!
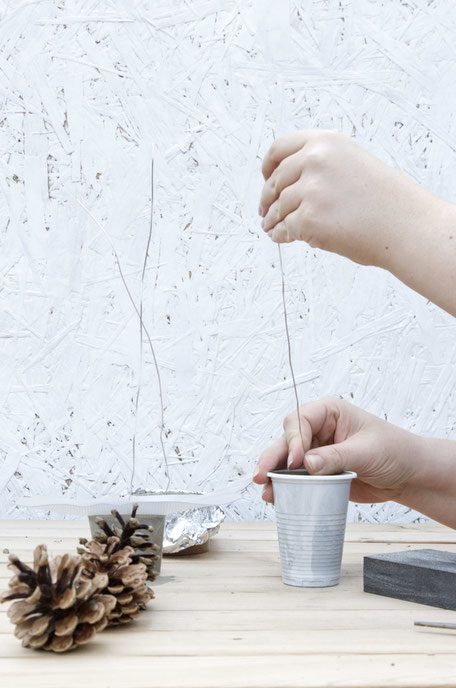
The Wire
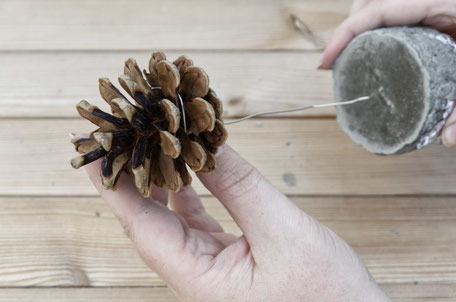
Cut the wire to desired length. I am going for 30cm which gives me enough room to play with. Bend a hook over your finger or reuse the rod from the wire bending for the Air Plant holder we made. The wire end with the hook will be inserted in the concrete base. See pictures below ...
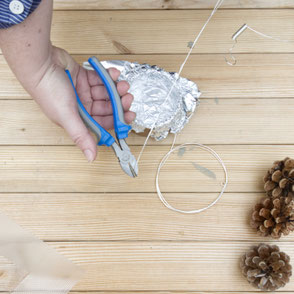
Cutting the wire with a wire cutter. A 1.5mm, 1.8mm or 2mm wire is a great choice for this tutorial.
Bend a simple hook or go for a full loop but anything other from straight will do. Keep in mind the base height you are working with so it can be inserted without showing on top or at the base.
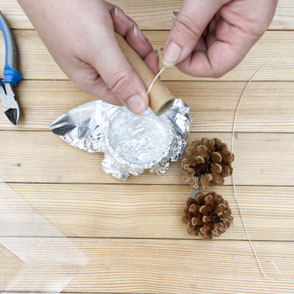
A little tip - insert the wire and bend it to the side. This way it should stay where you want the wire to be and you don't have to hold on to it.
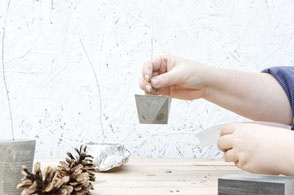
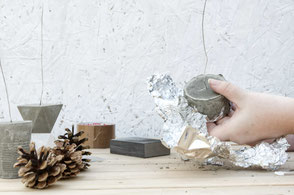
All done - letting it cure for a bout 2 hours. Have a look at the right hand picture. If your concrete looks a bit like that and the mould is not warm anymore it is time to unwrap.
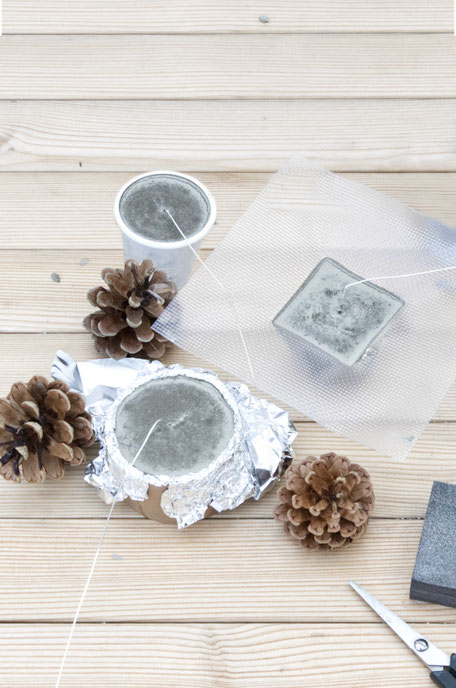
Unwrapping
First bend the wire back upwards and maybe wiggle it a bit so that concrete which stuck to it on unwanted areas falls off.
Than go on and get rid of those moulds, some tricks are shown below.
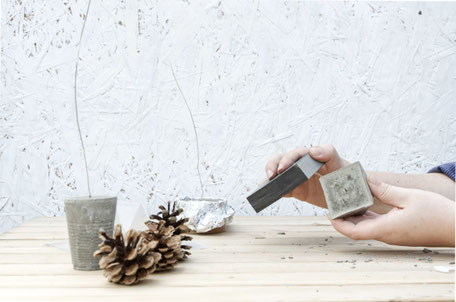
First try to wiggle the plastic mould gently to allow air between the plastic and the concrete surface. It could well be that you can reuse the mould but it will depend on the concrete.
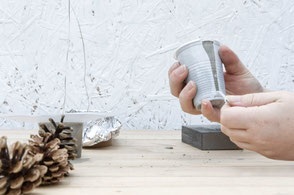
Well, the plastic cup wont allow for this so I cut the rim and peel it off.
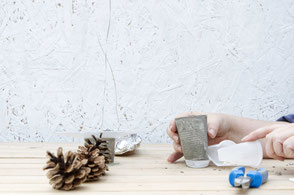
With the aluminium foil I am gentle as I want it to stick to the concrete on some areas. So I try to take it off only in areas where it is coming off very easy. You will feel the difference when doing it promise.
Sanding can be done but you don't have to. However, sometimes the top corner or edge is not so nice and a fine sanding paper or block could just do the trick to smooth things out. Once you are happy with the look - clear the space and go on and take your pine cones.
Lay your concrete solids on the side and bend the remaining end of the wire into another hook. You can use the method shown above.
Use the lower end of the pine cone base to hook on and turn the pine cone gently along the wire. In a motion that the pine cone is rolling up the wire.
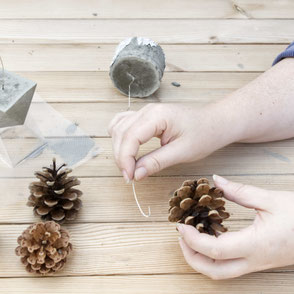
Have a look on the left hand side, you can see how the wire went around the pine cone and I got on with bending it back so that the pine cone sits up nicely like shown below.
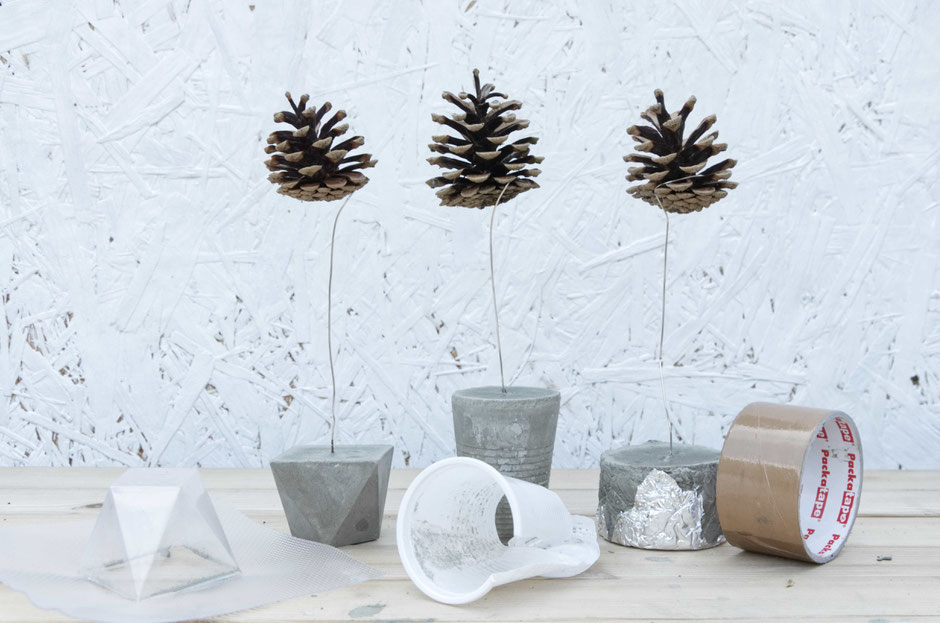
All done - and ready to be decorated! Some inspiration on how a table scape could look is on the right and of course below the quick instruction cheat sheet if you like to keep it or pin it.
I hope you enjoyed this post, happy crafting and I look forward to your comments,
Antje


You might also like ...


Write a comment